March 5, 2026
Have you ever looked at a favourite denim jacket or a trusty canvas tote and felt it was missing a little something? A spark of personality, perhaps? That's where the simple, wonderful world of iron-on patches comes in. It's a way to tell your story, piece by piece, without ever having to pick up a needle and thread.

These little embroidered treasures are seeing a huge resurgence, and it’s easy to see why. They create a beautiful bridge between timeless Scandinavian folk art traditions—like the classic Dala horse—and our modern love for DIY customisation. Suddenly, anyone can be a designer, turning everyday items into wearable art.
We’ve put this guide together to walk you through the entire process, sharing the tips we've learned along the way. We’ll cover everything you need to feel confident:
Get ready to breathe new life into your wardrobe. This is about more than just decoration; it's about making things that feel completely, authentically you.

The secret to a patch that stays put for years to come? It all starts with a little prep work before your iron even gets warm. Don't make the common mistake of using a wobbly ironing board; you need a solid, heat-safe surface like a table or countertop to get that firm, even pressure for a perfect bond.
Another tip I always share is to pre-wash and dry your garment. It might seem like an unnecessary step, but it prevents the fabric from shrinking later, which can cause your beautiful new iron on patches to pucker and pull away from the material. Trust me, it's a simple bit of prep that makes all the difference.
Think about your fabric choice, too. These patches absolutely love natural fibres. Hearty materials like denim, canvas, and good old cotton are your best friends here. On the other hand, you'll want to steer clear of anything synthetic and heat-sensitive like nylon, or delicate fabrics such as silk. The high heat needed for the adhesive can easily damage them.
It's no surprise that patches are having a moment. They're a simple way to add so much personality to your things, and the market reflects that. The global embroidered patches market was valued at a huge USD 99.89 million in 2023, and it's still growing.
Alright, let's get that beautiful patch of yours attached so it stays put for good. Getting this right is all in the preparation and a little bit of patience.
First things first, get your iron good and hot. You’re aiming for a high heat setting, right around 175°C. The most important thing here? Make sure the steam function is completely turned off. Steam is the number one enemy of a secure patch, as moisture will stop the adhesive from properly bonding.
Here’s a little trick I’ve learned that makes all the difference: pre-heat the fabric. Just give the spot where your patch will live a quick press with the hot iron. This warms up the fibres of your jacket or bag, making them much more receptive to the adhesive and creating a far stronger bond.
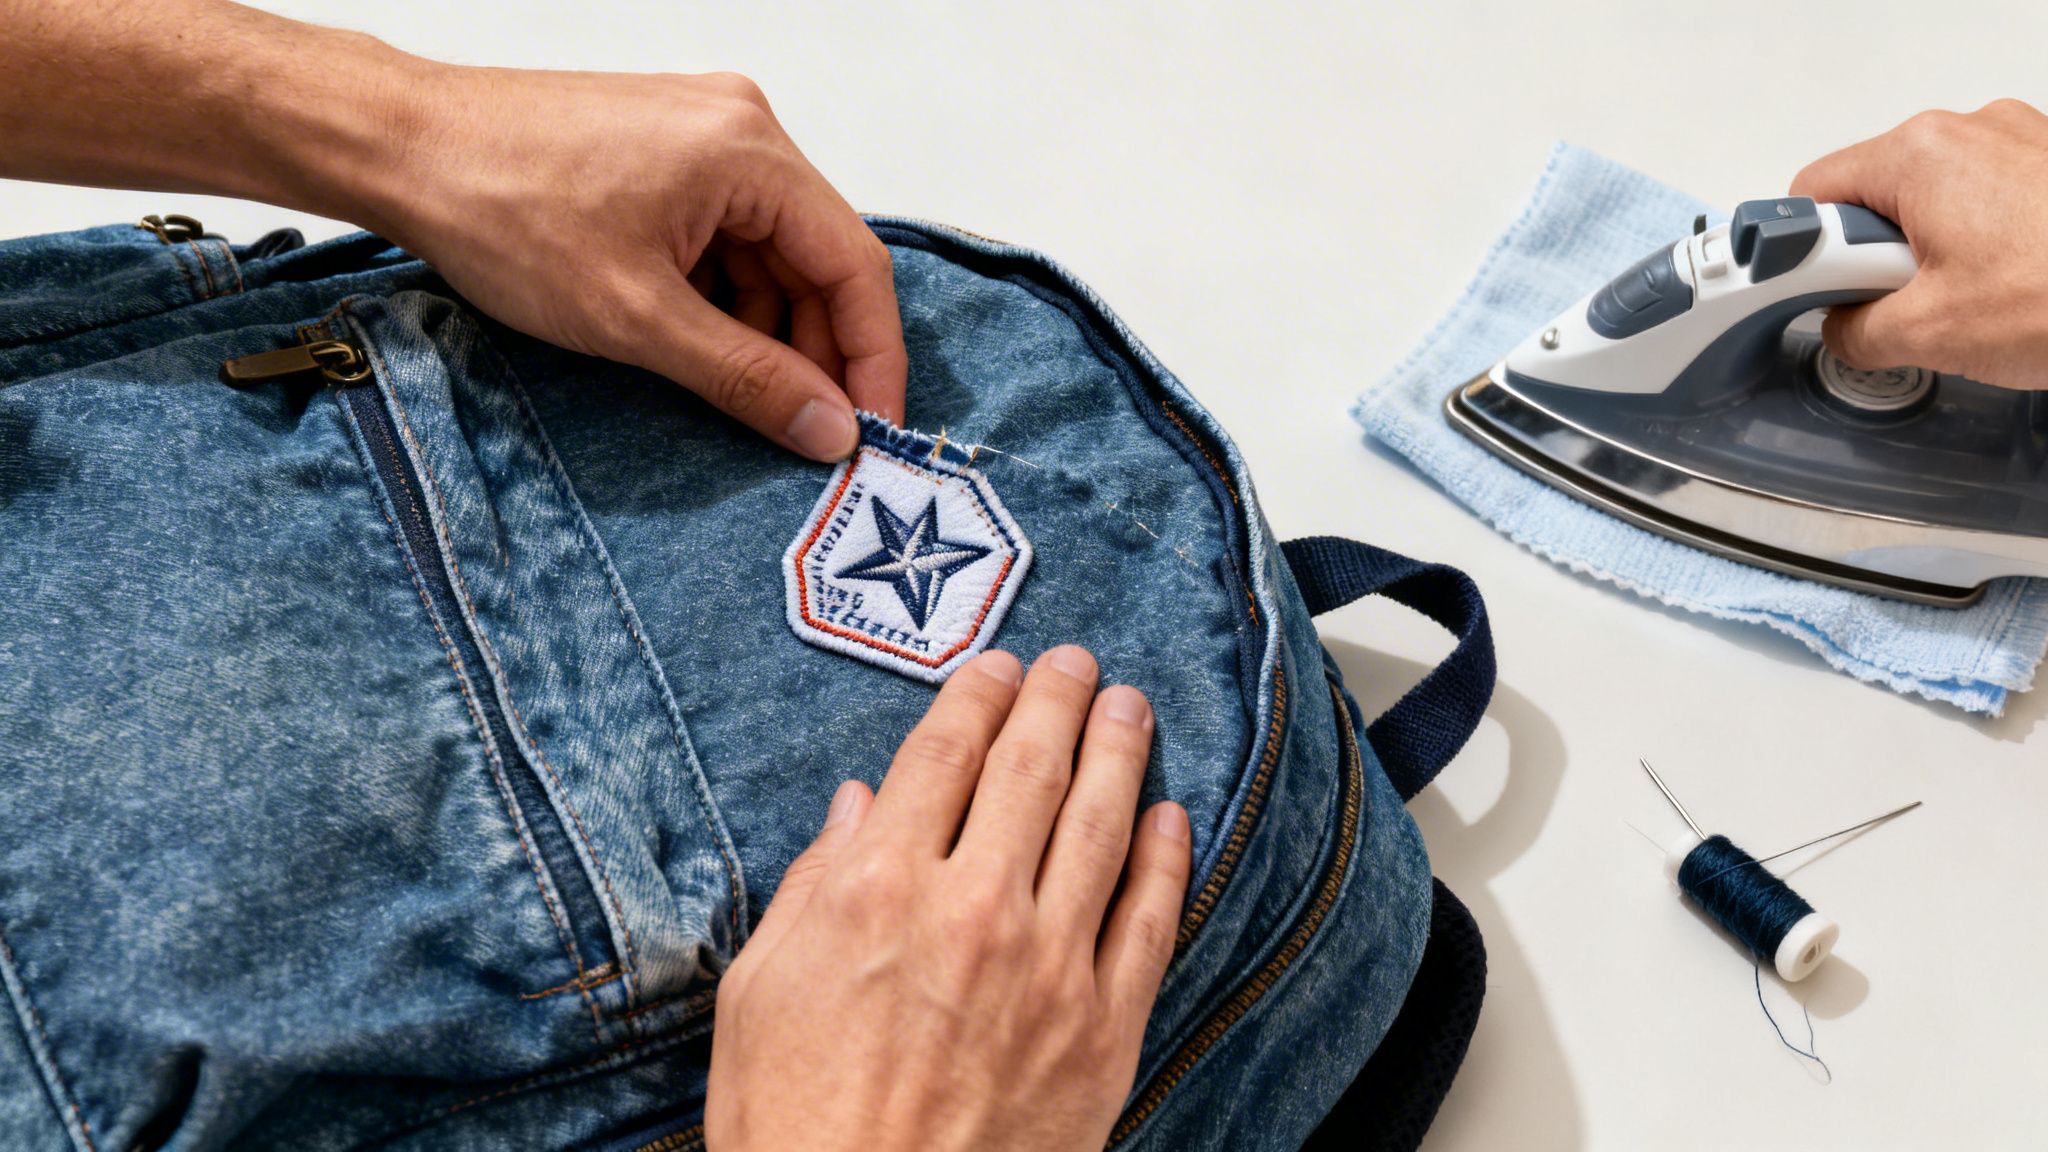
Now that the area is warm, place your patch exactly where you want it to be. To protect the delicate embroidery from the direct heat, cover it with a thin pressing cloth. A simple cotton tea towel or an old pillowcase works perfectly for this.
My Best Tip: When you press, use firm and consistent pressure. Hold the iron firmly in place for 30-45 seconds. Resist the urge to slide it around like you’re ironing a shirt; you want to apply even, steady heat across the entire surface to melt the adhesive uniformly.
Once you’ve pressed the front, don’t stop there. Turn the garment inside out and iron the area directly behind the patch for another 30 seconds. This is the step that truly locks it in, ensuring the melted glue works its way deep into the fabric weave.
Let it cool down completely before you start poking and prodding the edges. This gives the adhesive time to fully set, creating a permanent, lasting bond.
Even when you follow the steps perfectly, you might find a corner of your iron on patches starting to lift. This happens, especially on items that see a lot of life and movement. But don't worry, it's an incredibly easy fix.
Simply grab your pressing cloth again, lay it over the patch, and press the lifting edge firmly with a hot iron. Hold it for about 10-20 seconds to give the adhesive a chance to reactivate and bond with the fabric once more.
For pieces you know will be put through their paces—think jacket elbows, the straps of a well-loved backpack, or the knees of a child's trousers—a few extra stitches can be your best friend. A simple running stitch around the border of the patch is all it takes to add that extra layer of long-term security.
The real secret to making your patches last, however, lies in how you care for them after they're applied. Proper washing is everything. Always turn your garments inside out before they go into the machine, and stick to a cold, gentle cycle. Most importantly, always air dry.
The intense heat from a tumble dryer is the number one enemy of patch adhesive. Following these simple habits will do more than anything else to keep your Dala-inspired art looking vibrant and staying securely attached for years to come.
Now we get to the really fun part—letting your creativity run wild. Think of your iron on patches as more than just a quick fix for a tear. See them as your personal artistic tools for weaving rustic Scandinavian folk art into your modern wardrobe.
Why not tell a story across the back of a denim jacket? You could create a whole scene using a collection of Dala horse and rooster patches. Even a single, carefully chosen patch can transform a simple canvas tote bag or a plain pencil case into something truly special and eye-catching. This idea isn’t just for clothing, either; imagine customising a few throw pillows to bring a cosy, authentic touch of Scandinavian charm right into your living room.
Patches are also a wonderful way to create deeply personal and thoughtful gifts. Embellishing a baby blanket or a simple kitchen apron with a meaningful folk-art design makes for a unique present that comes straight from the heart.
This isn't just a niche hobby; it’s part of a much bigger trend. The decorated apparel market in Asia Pacific alone was valued at USD 10.6 billion in 2023, with a projected growth of 13.0%. You can dive deeper into these figures over at Prophecy Market Insights. For more inspiration, you can also explore our own guide on incorporating Scandinavian style clothing into your daily life.
While ironing is a fantastic and quick way to apply your patches, there are times when you'll want to skip the heat. Perhaps you're working with a delicate fabric like silk or nylon, or maybe you're customising a treasured vintage jacket that can't risk exposure to a hot iron. In other cases, you might just be after the most permanent, heirloom-quality bond you can get.
There's something special about a hand-sewn patch. It adds a layer of authenticity and personal touch that simply can't be replicated. For an incredibly durable and classic look, consider sewing your patch on.
Simple stitches like a running stitch or a tidy whipstitch around the border will secure your patch beautifully. This method not only provides a rock-solid attachment but also enhances the charming, handcrafted feel of your piece. If you're looking for some inspiration on different stitching styles, our post on creating cross-stitch letters has some wonderful techniques you can adapt.
If sewing isn't for you but you still need to avoid the iron, permanent fabric glue is the perfect solution. Be sure to choose an adhesive made specifically for textiles. This is crucial because a proper fabric glue is designed to stay flexible and withstand washing, so your patch won't become stiff or peel off over time.
This handy decision tree can give you some great ideas on where to place your patches for the most impact.
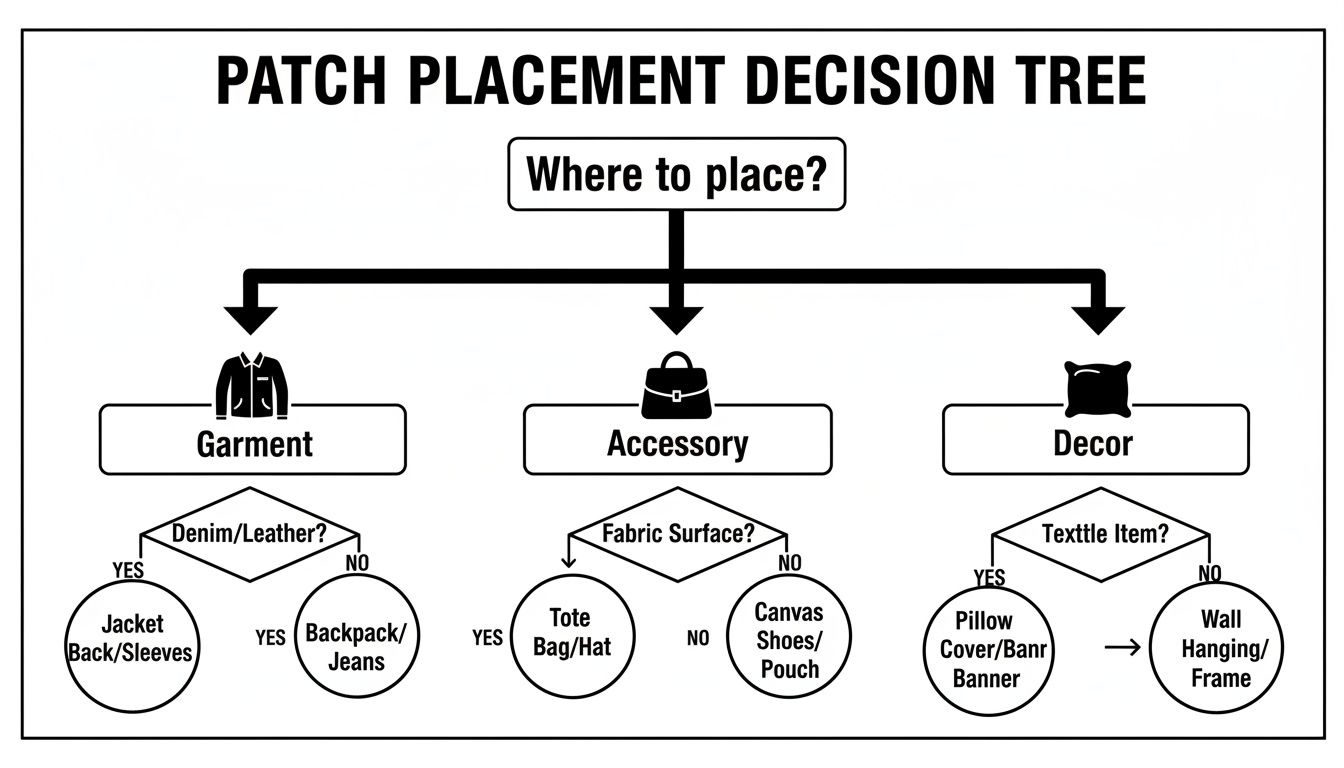
As you can see, the flowchart branches out with creative suggestions for everything from jackets and bags to unique home decor items.


.svg)


.png)


