December 14, 2025
Welcome to the fascinating world of one-line drawing. It’s an art form where a single, unbroken stroke can bring surprisingly complex and expressive images to life.
A one-line drawing is exactly what it sounds like: a piece created with a single, continuous line that never lifts from the page. This technique, sometimes called contour drawing, is loved for its ability to capture the essence of a subject with striking simplicity and fluid movement. It's a fantastic exercise in confidence and control.

This guide will demystify the art of the one-line drawing, exploring why it captivates artists with its perfect blend of simplicity and depth. It’s an approach that values the journey of the line—the flow—over flawless accuracy.
The real beauty of this technique is how accessible it is. You don’t need expensive materials or years of training to get started. Instead, it encourages you to see your subjects differently, forcing you to focus on the outer contours and the path your hand needs to take. This unique perspective makes it an excellent foundation for any aspiring artist.
The idea of creating art with a single continuous line has deep historical roots, long before it became a feature of modern minimalism. In Cambodia, for instance, one-line drawings go all the way back to the Angkor period, where Khmer sculptors used continuous lines in their incredible stone bas-reliefs.
Incredibly, this ancient practice influenced 90% of surviving murals in the region's temples. After Cambodia's independence in 1953, the style saw a modern revival, and by 1960, a staggering 60% of Phnom Penh's art school graduates specialised in these ink one-liners. It’s a technique with a rich and surprising history, which you can read more about in this deep dive into the evolution of Asian art on Wikipedia.
At its core, one-line drawing is a conversation between your eyes, your brain, and your hand. The goal isn't just to replicate an object but to interpret its form in a single, fluid motion.
This guide is designed to get you ready for a new creative journey, walking you through everything from essential warm-ups to practical, hands-on exercises. We’ll show you how this method is less about perfection and more about building artistic confidence.
You'll learn how to translate this skill into unique, personal projects, like customising your very own Dalaart DIY wooden models. By the end, you'll see just how a simple, unbroken line can become a powerful and beautiful tool for expression.
Before your pen even touches the paper, getting the right tools sorted and your hand properly warmed up can make all the difference. The beauty of one-line drawing lies in its wonderful simplicity, and that extends to the materials you need. You really don't need a fancy setup—a smooth-flowing pen and some good paper are your best friends on this journey.
For pens, I find that a fine-liner like a Sakura Pigma Micron or a decent gel pen works wonders. What you're looking for is a consistent, skip-free line, which is absolutely crucial when you can't lift the pen. While pencils are great for a bit of practice, there's something about the finality of ink that encourages a more confident, deliberate stroke.
When it comes to paper, go for something with a smooth surface. Bristol board or a quality sketchbook paper is perfect for preventing your pen from snagging mid-flow.
Just like an athlete stretches before a race, an artist should warm up their hand and mind. These simple exercises are fantastic for building muscle memory, improving control, and just getting you into that creative headspace. They only take a few minutes but pay off immensely.
Start with some basic movements to loosen up your wrist, arm, and shoulder. Don't forget, the best lines don't just come from your hand; they flow from your entire arm.
Remember, the goal of these warm-ups isn't to create a perfect masterpiece. It’s about training your hand to move with intention and grace—building that crucial connection between what your mind sees and what your fingertips create.
One of the most important—yet often overlooked—skills in one-line drawing is pre-visualisation. Before you even think about putting pen to paper, trace the object you want to draw with just your eyes. Follow its contours, mentally plan the path your line will take, and decide where it will begin and where it must end. This mental rehearsal is what prepares you for the physical act of drawing. It’s what separates a hesitant scribble from a piece of fluid, intentional art.
Interestingly, the minimalist nature of this art form has historically served practical purposes far beyond aesthetics. It became a mode of survival for artists during racial riots in Malaysia and Indonesia, where creating one-line drawings reduced material needs by a staggering 80% compared to traditional full-colour oils. This efficiency allowed art to thrive even when resources were scarce.
This powerful history is reflected in a growing modern interest; a 2023 study showed that Southeast Asian publications on minimalist line art have surged by 300% since 2017. You can dive deeper into this rich regional history in this article on Southeast Asian art.
Right then, with your hand and eye warmed up, it’s time to move beyond practice scribbles and start making things that actually look like something. This is the fun part, where abstract lines start turning into recognisable forms. The trick is to start small and build your confidence. Don't try to draw a masterpiece on your first go.
Start with the basics: simple geometric shapes. Think squares, circles, and triangles, but the catch is, you can't lift your pen. You have to plan the path your pen will take. For a square, you could start at a corner, draw three sides, cut diagonally across to the starting point, and then finish that last side. It feels a bit like a puzzle, and it’s brilliant for training your brain to see an object as one continuous journey.
Once you've got the hang of straight lines and sharp corners, let's loosen up with some organic, flowing shapes. Think of things you'd find in nature—a smooth pebble, a simple leaf, or the petals of a flower. These shapes are much more forgiving than a perfect square, giving you a fantastic opportunity to practise smooth curves and natural contours, all in one unbroken line.
For example, with a leaf, you could begin at the stem, trace the outline up one side, loop around the tip, and then flow back down the other side. This is the kind of movement that really gets you into the rhythm of one line drawing.
Before you put pen to paper, though, it helps to have a simple process in mind. It's not just about diving in; a little preparation goes a long way.
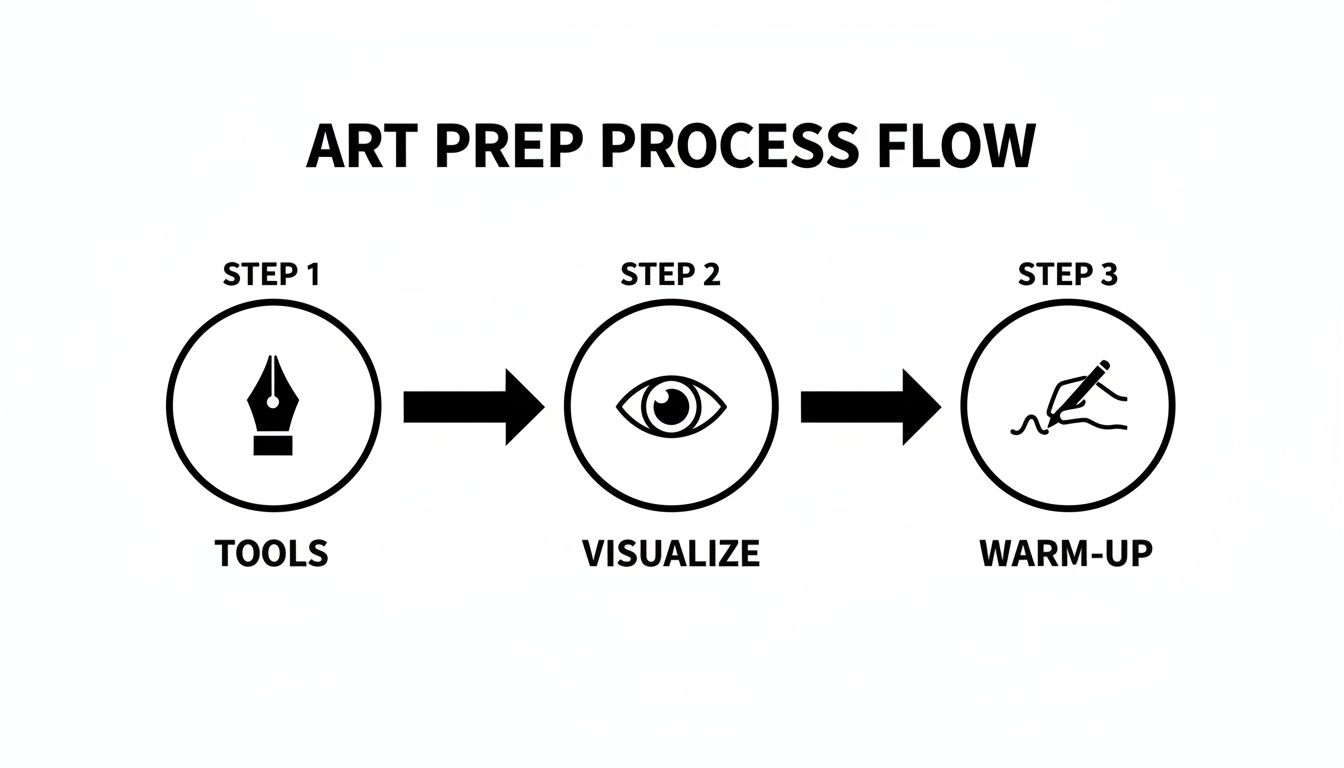
This little workflow is a great reminder that a successful drawing starts before you even begin. It's all about getting your tools ready, picturing the final piece, and warming up your muscles.
Ready to add a bit of personality? Let’s try drawing some simple animals. A cat or a bird is a perfect next step. Remember, the goal isn't a photorealistic portrait; it’s about capturing the essence of the animal. Think about its silhouette, its posture, its character—all conveyed with that single, flowing line.
Picture a sitting cat. You could start at the tip of one ear, let your pen flow down the curve of its back, loop around to form the tail, then trace the underbelly and legs before swinging back up to finish the head and the other ear. It’s all about finding that one seamless path.
The secret to drawing complex subjects is to simplify them. Break the form down into its most essential contours and find the single, most logical path that connects them all.
To really put this into practice, we’re going to tackle a classic folk art motif that’s just begging to be a one-line drawing: the Dala horse. This iconic Swedish symbol, with its sturdy shape and elegant curves, is a fantastic subject for testing your new skills.
Here’s one way you could approach it:
This method of breaking down a subject into a single path is incredibly versatile. It actually has a lot in common with other pattern-based arts, like embroidery. If you’re curious about how lines create images in different crafts, our guide on creating lovely cross-stitch letters offers another perspective on pattern and form. Ultimately, the Dala horse exercise is about more than just drawing—it’s about learning to see the world as a beautiful series of connected lines.
A great one line drawing is much more than just a clever, unbroken line—it’s about thoughtful composition. Mastering a few key design principles is what elevates a simple sketch into a compelling piece of art. It’s about making every part of that single line count.
One of the most powerful tools at your disposal is negative space—the empty area around your subject. By intentionally shaping this space, you can define your subject’s form just as effectively as the line itself. Think of it as a silhouette in reverse; the line creates a boundary that gives the emptiness meaning, making your drawing feel balanced and complete.
A constant, uniform line can feel a bit flat. To add depth and visual interest, you need to practise varying your line weight. Simply by adjusting the pressure on your pen, you can create thicker, bolder lines for areas you want to emphasise or thinner, lighter lines for delicate details.
For instance, a heavier line can suggest shadow or bring a feature forward, while a lighter touch might indicate distance or a softer edge. This subtle variation makes your one line drawing feel much more dynamic and three-dimensional, guiding the viewer’s eye through the piece.
Your single line is a storyteller. Its weight, speed, and path all contribute to the narrative of the form you're creating. Treat it not just as an outline, but as an expressive tool in its own right.
This intentional use of line to create a sense of unity and place has fascinating parallels in art history. Singapore, for example, became a hub for one-line drawing in Southeast Asia, with roots in the Nanyang movement after 1945. Works from this period often used single-perspective lines to symbolise unity in a complex social environment. After separating from Malaysia in 1965, one-line ink pieces saw a 50% rise in national exhibitions, using their distant observer viewpoint to represent harmony. You can discover more about the historical significance of line art in Island Southeast Asia on artoftheancestors.com.
Every artist hits a few common roadblocks, especially with a technique as unique as this. Recognising them is the first step to turning them into stylistic strengths.
Here are a few frequent challenges and how to fix them:
By anticipating these issues, you can approach your one line drawing with more confidence. These skills are not just for paper; they can beautifully translate to other mediums. If you're interested in applying minimalist designs to different surfaces, our guide on creating stunning wood wall art explores similar principles of form and composition.
So, you’ve spent time honing your skills on paper, and now it’s time for the really fun part: bringing your creations into the three-dimensional world. This is where all that practice translates into unique, personalised pieces that can transform everyday objects.
The jump from a flat page to a physical project is always exciting. You can apply your designs to almost anything, from textiles to ceramics, but I find one of the most satisfying canvases is wood. Its natural, warm surface creates a beautiful contrast against a crisp, black line.

A DIY wooden model, like one of our Dala horses or bird figures, is the perfect place to start. The defined shapes give you a natural framework, letting you focus entirely on the flow of your line as it wraps around the form.
Before you commit, lightly sketch your design onto the wood with a pencil. This gives you a chance to finalise the path and make sure you’re happy with the layout before making it permanent.
When you're ready, having the right tools makes all the difference.
The goal isn’t just to place a drawing on the object, but to make the art feel like an integral part of its form. Let your line follow the natural curves and contours of the wooden figure.
Once you've decorated a wooden model, you'll start seeing opportunities for one-line art everywhere. The same principles apply to countless other home decor projects, turning your artistic practice into beautiful, functional items.
Why not try creating custom cushion covers? All you need are fabric paint pens and a simple cotton cover to draw a minimalist face or a flowing botanical design. Or, decorate a ceramic mug using porcelain paint pens—just be sure to bake it according to the manufacturer's instructions to make it permanent and food-safe.
Your one-line drawing can also become stunning minimalist wall art. Draw directly onto a canvas or a piece of high-quality art paper and frame it for an elegant statement piece. You can even add pops of colour to your designs; our guide to using a colour mixing chart is a great resource for finding the perfect shades to complement your line work. The possibilities really are endless.
As you start exploring the world of one line drawing, you're bound to run into a few little hiccups. It’s a totally normal part of learning any new skill. To help you out, I've put together some answers to the most common questions beginners ask, giving you clear fixes so you can build your creative confidence.
Think of this as your personal troubleshooting guide for those little bumps in the road that can get between you and a beautifully smooth, flowing line. Once you’ve got these sorted, you can focus on what really matters—finding your own unique artistic style.
Wobbly lines are probably the number one frustration for anyone new to this. The secret is realising that a steady line comes from your whole arm, not just your hand or wrist. Try drawing from your shoulder, aiming for broad, confident movements instead of tight, hesitant little ones.
And don't underestimate the power of a quick warm-up. Seriously, just spending five minutes making continuous waves and spirals before you start a drawing can make a massive difference to your control. Speed is also a factor; sometimes, a slightly faster, more decisive stroke is far smoother than one that’s slow and tentative.
Confidence is your best friend here. The more you practise, the more that muscle memory will kick in, and your lines will naturally become steadier. Forget perfection—just aim for progress.
That blank page can feel pretty intimidating, but the truth is, the best subjects are usually the simplest things right in front of you. You don’t need some elaborate setup to create a fantastic one line drawing.
Start with everyday objects and see where it takes you:
Not at all! In fact, planning is a massive part of the process. Thinking through your line’s path before you even start is a core skill that turns a random doodle into a piece of intentional art. Lots of artists trace the object with their eyes first or even lightly sketch out the path in pencil before going in with the pen.
Remember, the challenge of a one line drawing is in the execution of that continuous stroke, not in making it up on the spot. Planning your route helps you solve the puzzle of the path before your pen touches the paper, leading to a much stronger and more cohesive final piece. It lets you relax and focus on the quality of your line itself.
Ready to put your new skills to the test on a beautiful, tangible project? At Dalaart, we offer authentic, unpainted DIY wooden models that are just waiting to be personalised with your own unique one line designs. Explore our collection and kick off your next creative adventure.


.svg)


.png)


