December 25, 2025
At its heart, a one line art drawing is a captivating art form where an entire image comes to life from a single, unbroken line. The technique is beautifully simple: the pen touches the paper and doesn't lift until the piece is complete. It’s this continuous flow that captures the essence of a subject, creating something expressive and dynamic from a single stroke.
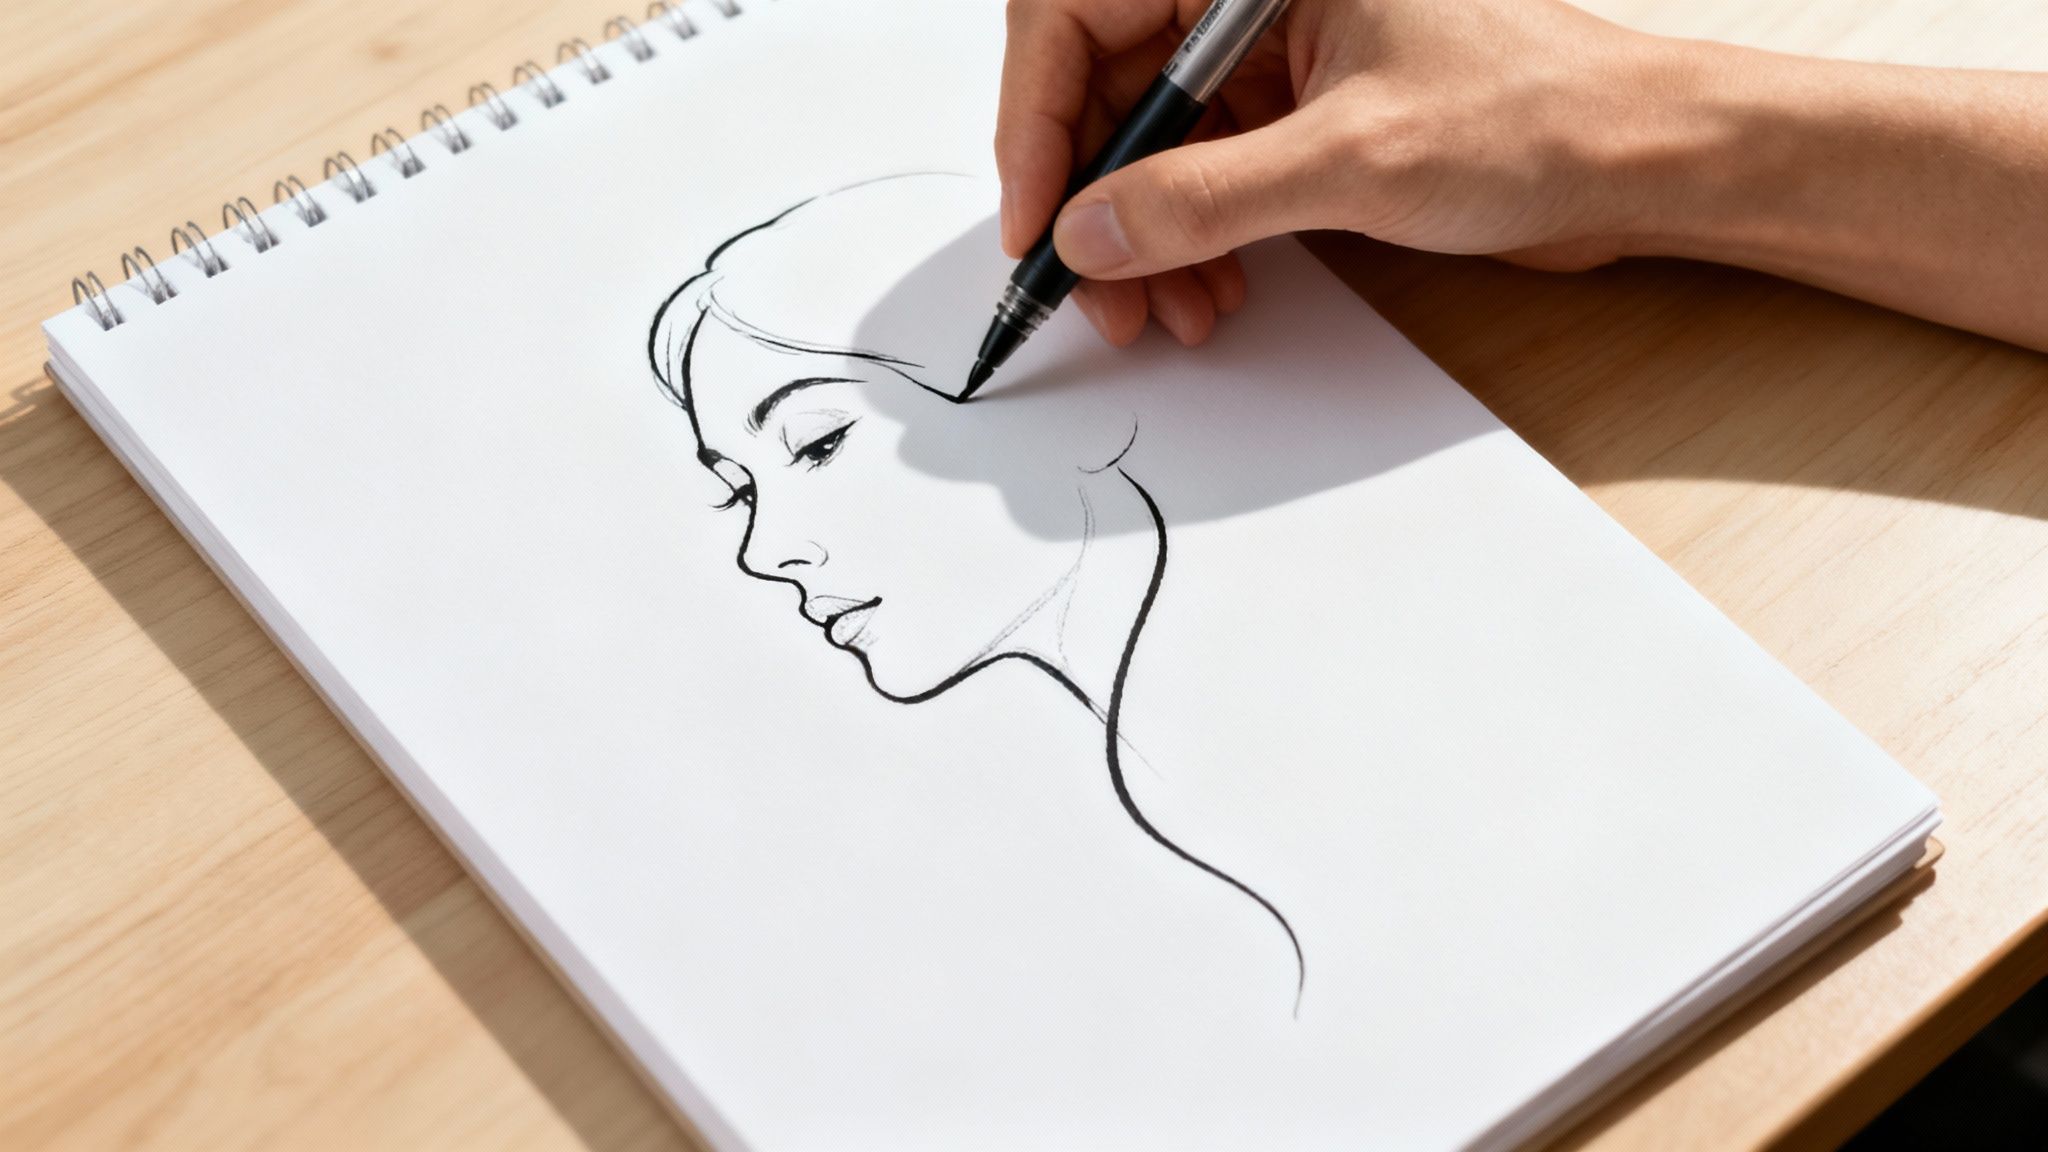
The magic of a one line drawing is all in the journey. Once your pen makes contact, it begins a continuous path, tracing contours, suggesting shapes, and defining form in one fluid motion. This style forces you to see your subjects in a new light—not as a collection of separate parts, but as an interconnected whole.
This technique is less about chasing photorealistic perfection and much more about capturing the life and energy of your subject. The final piece becomes a record of the artist's movement just as much as it is a depiction of the subject itself. This focus on the process over a flawless result is what makes every single drawing so unique and personal.
One of the first things you learn in this art form is to let go. Mistakes and so-called "happy accidents" aren't just common; they are an essential part of the aesthetic. A slight wobble here or an unexpected loop there can add character and a sense of spontaneity that a perfectly rendered drawing might be missing. The goal is simply to embrace the flow.
Think about how this approach applies to different subjects:
The core principle is to see the path before your pen travels it. By mentally tracing your subject, you prepare your hand to move with confidence, allowing the line to unfold naturally and create a cohesive, energetic piece.
This minimalist approach isn't new; it has roots that stretch back to modern art movements, where artists have long been fascinated with the power of a single line. From the playful, flowing figures in the work of Keith Haring to the simplified animal drawings of Picasso, the single line has proven itself as a powerful tool for expression. You can explore this lineage further by looking into the iconic simplicity found in Keith Haring posters, where continuous lines create vibrant, accessible art.
This guide will help you shift your focus from perfect rendering to capturing that continuous energy, setting the stage for your own artistic journey.
Getting the right tools is the first step towards achieving that smooth, uninterrupted flow that makes a great one line art drawing so captivating. While you can certainly start with any old pen and paper you have lying around, you'll quickly find that understanding how different materials work together can seriously elevate your art.
The pen you choose has a huge impact on the character of your line. It's the difference between a stroke that's crisp and uniform, and one that swells with expressive energy. For many artists, a trusty fine-liner is the go-to.
Your paper is just as important as your pen. The texture of your drawing surface, often called its "tooth," dictates how the pen glides across it. A really smooth paper is your best friend here, as it allows for effortless, fluid movements, cutting down on friction and the frustrating chance of your pen snagging mid-flow.
Smooth Bristol board is an excellent choice for this very reason. Its dense, plate-like surface lets your pen move without any resistance, making it much easier to keep your line continuous. That said, a paper with a little bit of tooth can add its own unique character, grabbing a bit more ink to create a subtle texture within the stroke. The best way forward is to experiment with a few different paper types to see what feel you prefer.
The connection between your pen and paper is completely tactile. When you find a combination that just feels right in your hand, that confidence will shine through in more fluid drawings. You'll be able to focus on your subject instead of fighting with your tools.
Why stop at the page? Taking your designs and applying them to physical objects, like a wooden DIY Dala horse, is a fantastic way to bring your art to life. This just requires a few specific tools to transfer your art accurately, bridging the gap between a sketch and a tangible, personalised craft.
The most reliable method I've found involves using carbon paper. It's a simple process: you just place the carbon paper between your drawing and the wooden surface, then trace over your original line. This leaves a clean, faint guide on the wood, ready for you to paint or carve over. For a more direct approach, you could also look into specialised transfer pens and paper. These tools ensure your beautiful one line art drawing is perfectly replicated, ready to become a unique piece of decor.
Right, this is where the fun really starts – pen to paper, idea to reality. The whole point here isn't to get bogged down in rigid rules but to build a bit of confidence and get a natural, easy connection going between your hand and your eye. Think of it more as play than practice.
What you're really doing is building muscle memory. It's just like a musician practising scales or an athlete running drills; you're training your hand to move with a fluid, self-assured stroke. The more comfortable you get with the simple act of drawing one long line, the easier it will be to pull those images from your mind onto the page.
This infographic breaks down the essential flow, from a spark of an idea to a finished physical object.
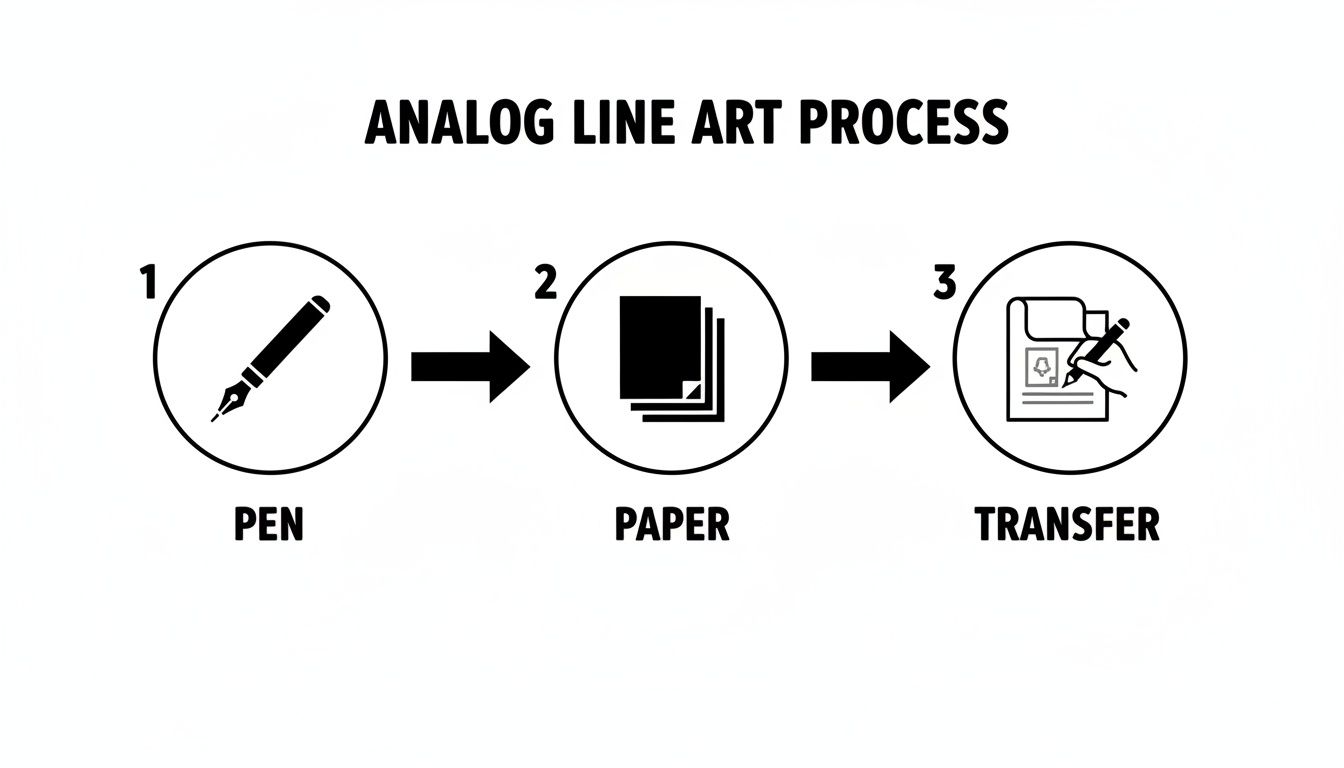
It shows how a simple drawing can be the first step toward creating something tangible, like a decorated Dala horse you can hold in your hand.
Before you even think about drawing a proper subject, you need to warm up. These aren’t tedious chores; they’re freeing movements meant to get your creative energy flowing and loosen up your arm.
Grab a blank sheet and just start filling it with simple, repetitive shapes, all without lifting your pen.
These drills help you get used to keeping that pen on the paper and moving it in all sorts of directions without a second thought. You’ll be surprised how quickly your lines start to look smoother and more confident.
The real point of warming up is to shut down your inner critic. When you're just doodling swirls and lines, there’s no pressure for it to be a "good" drawing. This frees you up to focus on nothing but the motion itself.
Once your hand feels loose and ready, it’s time to try drawing some simple objects you have lying around. Pick something with a really clear, distinct outline – a coffee mug, a leaf from the garden, a pair of scissors. Before you even start, take a second to mentally trace its contour.
Imagine your pen is already moving along all its edges. Where’s the best place to start? Which way will you go? This little mental rehearsal is a huge part of creating a successful one line art drawing. It helps you map out a path for your pen before you even make a mark.
As you get more comfortable, you can start tackling more complex subjects. The principle is exactly the same, though: find the path.
The trick is to stop seeing the subject as a collection of separate features and instead see it as one single, interconnected shape. If you're interested in mythical creatures, these same techniques are perfect for bringing them to life. For a step-by-step example, take a look at our guide on how to draw a unicorn using flowing, continuous lines. This approach works just as well for a traditional Dala horse motif, where one unbroken stroke can capture its iconic, sturdy silhouette. The secret is always in breaking down the complexity into one logical, flowing path.
Once you’ve got the hang of keeping your pen on the paper, it’s time to start thinking bigger—about the image as a whole. A truly great one line art drawing is more than just a continuous stroke; it's a careful dance between the line itself and the empty space that surrounds it. This is where composition comes into play, turning a simple sketch into a compelling piece of art.
Often, it's the invisible elements that make or break your drawing. Your line creates the positive space—the subject you're drawing—but the empty areas, known as negative space, are just as crucial. They define your subject’s silhouette and give it room to breathe, creating balance and real visual impact.
Think of negative space as a silent partner in your artwork. It’s not just "leftover" paper; it's an active ingredient that shapes and defines your subject. When you intentionally consider the shapes formed by the emptiness around your line, you can create a much stronger and more dynamic image.
For example, when drawing a portrait, the space between the chin and the shoulder forms its own distinct shape. Making that shape interesting and well-proportioned is just as important as getting the contour of the face right. Experienced artists are masters at manipulating these empty areas to add clarity and focus to their work.
A well-composed one line art drawing feels balanced and intentional. The viewer's eye should know exactly where to go, and that's achieved by carefully managing the relationship between your line and the space it occupies.
Getting this right is what makes a piece feel complete and thoughtfully designed, rather than like a random doodle.
Even with a single, unbroken stroke, you have powerful tools to suggest depth and form. One of the most effective techniques is controlling the density of your line. This simply means adjusting how close together or far apart your lines are in certain areas.
Believe it or not, you can create the illusion of shadow and value without ever lifting your pen.
This simple trick allows you to build three-dimensional form with nothing but a single line. It’s a subtle but incredibly effective way to add sophistication to your continuous drawings. Imagine drawing an apple; your line would be denser on the bottom and more open on the top where the light hits.
Your continuous line is more than just an outline; it's a pathway for the viewer's eye to follow. You can direct their journey through your artwork with clever overlaps and intentional routing. By making your line cross over itself at strategic points, you can create focal points and a sense of visual importance.
For instance, in a drawing of a Dala horse, you might have the line defining its back loop around to form the decorative patterns on its saddle before continuing down to the tail. These overlaps add detail and guide the viewer's focus to key features. This is how your one line art drawing transforms from a static contour into a dynamic visual story, where every twist and turn has a purpose.
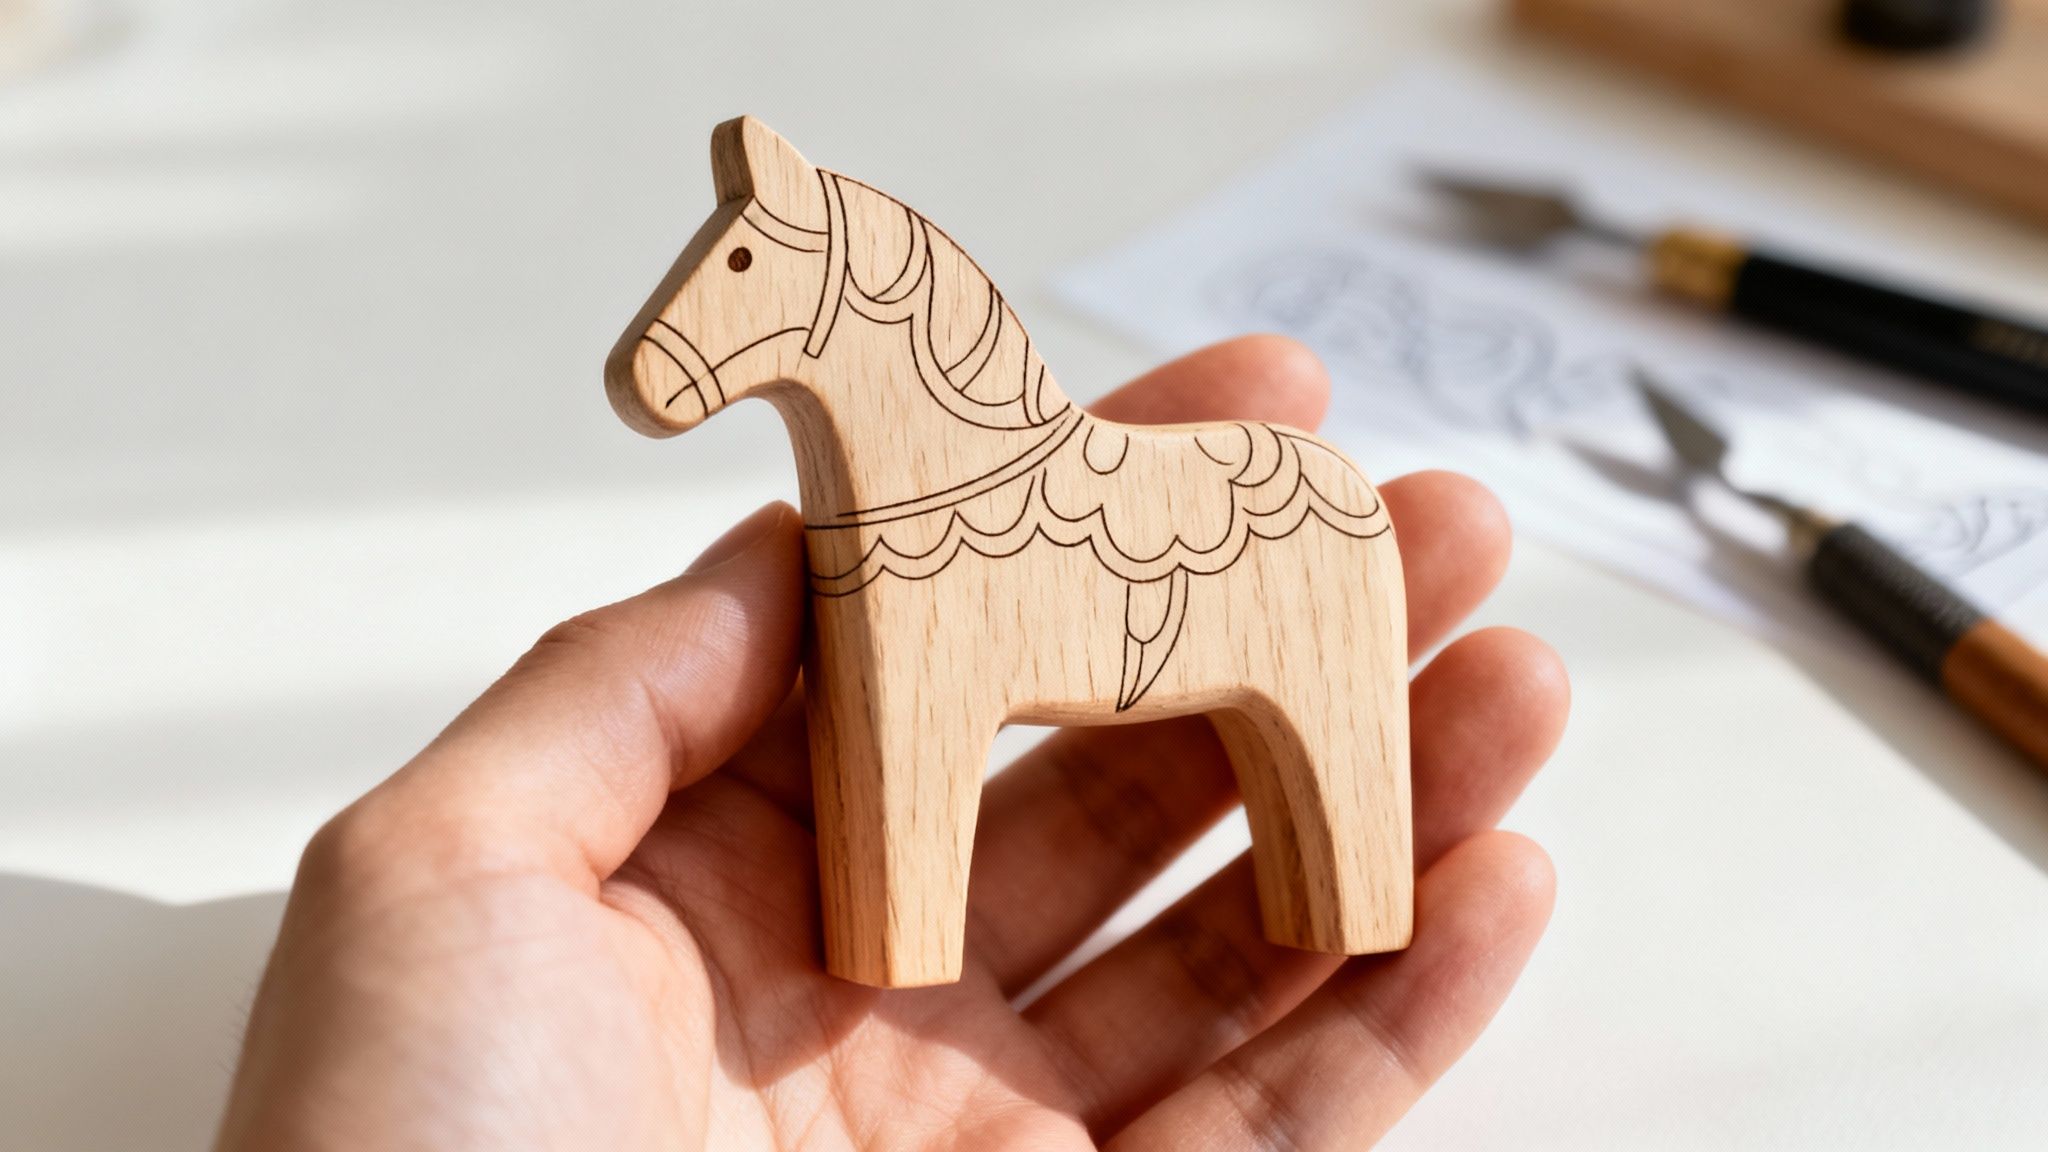
Now that you've got the hang of the continuous line technique, let's take your art off the page and onto something truly special. Transferring your one line art drawing onto a wooden surface, like one of our unpainted DIY Dala horse models, is a fantastic way to merge your new skill with a timeless craft. You'll end up with a personalised piece that really stands out.
The first thing you’ll want to do is digitise your drawing. This sounds more technical than it is, I promise. You can either use a flatbed scanner to get a high-quality capture or simply take a clear, well-lit photo with your smartphone.
Once you have the digital file, it’s a good idea to do a quick clean-up. Pop it into any basic photo editing software and bump up the contrast to make the line bolder. You can also erase any smudges or mistakes. This little step makes sure the design you transfer is crisp and clear, which is key for a professional-looking finish.
Before you hit print, you'll likely need to resize your image so it fits perfectly on your wooden object. For something like a Dala horse, you might even want to create separate, smaller designs for the saddle area and the body.
One crucial detail that's easy to forget: mirror your image horizontally before printing. This is absolutely essential if your design includes text or isn't symmetrical, especially for transfer methods where you place the printed side face down on the wood. Reversing the image ensures it appears the right way around in the final piece.
The point of digitising isn't to lose the handmade feel but to prep your art for a new medium. A clean, correctly sized, and mirrored print is your blueprint for a successful transfer.
With your design printed and ready, you've got a few solid options for getting it onto the wood. Each method gives you a different result in terms of permanence and precision, so you can pick the one that feels right for your project.
The most traditional and forgiving technique, and one that artisans have loved for years, is using carbon paper. Its simplicity and accuracy are hard to beat.
This carbon outline acts as the perfect guide whether you plan on painting, wood burning, or even doing some light carving. If you're feeling ambitious, these same techniques work wonderfully for scaling up your designs to create unique wood wall art. For a more direct approach, you could also use specialised heat transfer tools or pens, which embed the ink right into the wood grain for a durable, lasting finish.
As you start exploring continuous drawing, you're bound to run into a few tricky spots. Don't sweat it—every single artist hits these little snags. Let's walk through some of the most common questions that pop up on this creative journey.
Think of these challenges less like roadblocks and more like milestones. Every artist, from the absolute beginner to the seasoned pro, has asked these exact same questions at some point.
This is the number one fear when you're just starting out with a one line art drawing, but the answer is refreshingly simple: don't panic! Seriously, it happens to everyone. You've got a couple of solid options. You can try to place your pen back down exactly where you left off, aiming to reconnect the line as seamlessly as possible.
Or, you could just lean into it. Many artists find that these so-called "mistakes" actually add a wonderfully human, authentic touch to the final piece. They tell the story of how it was made. Remember, the real goal is to capture the overall flow and energy, not to chase some impossible idea of technical perfection.
The secret here is all about simplification and mapping out a smart path for your pen before you even start. Instead of getting bogged down trying to render every last detail, your goal is to simply suggest it with your single, flowing line. It's about capturing the essence of the thing, not a perfect replica.
A fantastic way to get the hang of this is by tracing over photographs. This exercise is brilliant for training your brain to see the most efficient, continuous path through complex shapes, which builds massive confidence for when you start your own original pieces.
Absolutely! While there’s a classic power to the simple black-and-white aesthetic, adding colour can bring a whole new dimension and mood to your work. One really popular method is to finish your black ink drawing first, then come back in with blocks of watercolour or digital colour to fill in certain shapes. This creates a stunning contrast between the fluid line and the solid forms.
Another great option is to switch things up from the start by using coloured pens or markers for the line itself. You'll be amazed at how this simple change can alter the entire feel of your artwork.
Ready to turn your beautiful line art into a timeless keepsake? Explore the collection of authentic, unpainted DIY Dala horses at Dalaart and start creating your own piece of Swedish tradition. Find your perfect model at https://dalaart.com.


.svg)


.png)


