March 23, 2026
A pokemon beads pattern is essentially your treasure map for creating Pokémon characters with fuse beads. These tiny plastic beads, when arranged on a pegboard and ironed, melt together to form a solid piece of art. The patterns themselves are usually based on the pixel art from the classic video games, giving you a perfect guide for placing each coloured bead to bring your favourite Pokémon—from Pikachu to Charizard—to life.
The world of Pokémon and the simple joy of crafting have come together in a brilliant way, sparking a hobby that connects with fans of all ages. Making Pokémon with fuse beads like Perler or Hama is much more than a creative pastime; it’s a tangible way to connect with a universe that has been loved for decades. It's a beautiful mix of childhood nostalgia and the satisfaction of making something with your own hands.
This craft has become a wonderful bridge, linking passionate gaming communities with creative crafting circles. A huge part of its charm is how accessible it is. You absolutely don’t need to be a master artist to get started. The pixel-based designs from the early Pokémon games provide a ready-made template for bead art, making it easy for anyone to dive right in.
For so many of us, working on a Pokémon beads pattern is a trip down memory lane. It feels a bit like revisiting the 8-bit world of Kanto, but this time, you're building it one bead at a time. Every project, whether it's a simple Poké Ball or a complex legendary like Lugia, becomes a small trophy of your personal fandom.
The process itself is a mindful escape. It lets you focus on the simple task of placing each bead, slowly watching a familiar face emerge from the grid. It’s also a hobby that grows with your own skill and ambition.
The real magic is in that moment you transform a digital character on a screen into a physical object you can hold, display, or give to a friend. It’s a celebration of both the games and your own creativity.
This fusion of pop culture and crafting has created a real buzz, especially in regions with strong gaming cultures. In Southeast Asia, and Singapore in particular, this trend has been easy to see. After regional gaming championships in 2012, sales for Pokémon-related crafts jumped by 35%. This interest only grew, and by 2025, Pokémon bead patterns had captured an 18% share of Singapore's $12 million craft market. You can review these findings to learn more about Pokémon's cultural impact in the region.
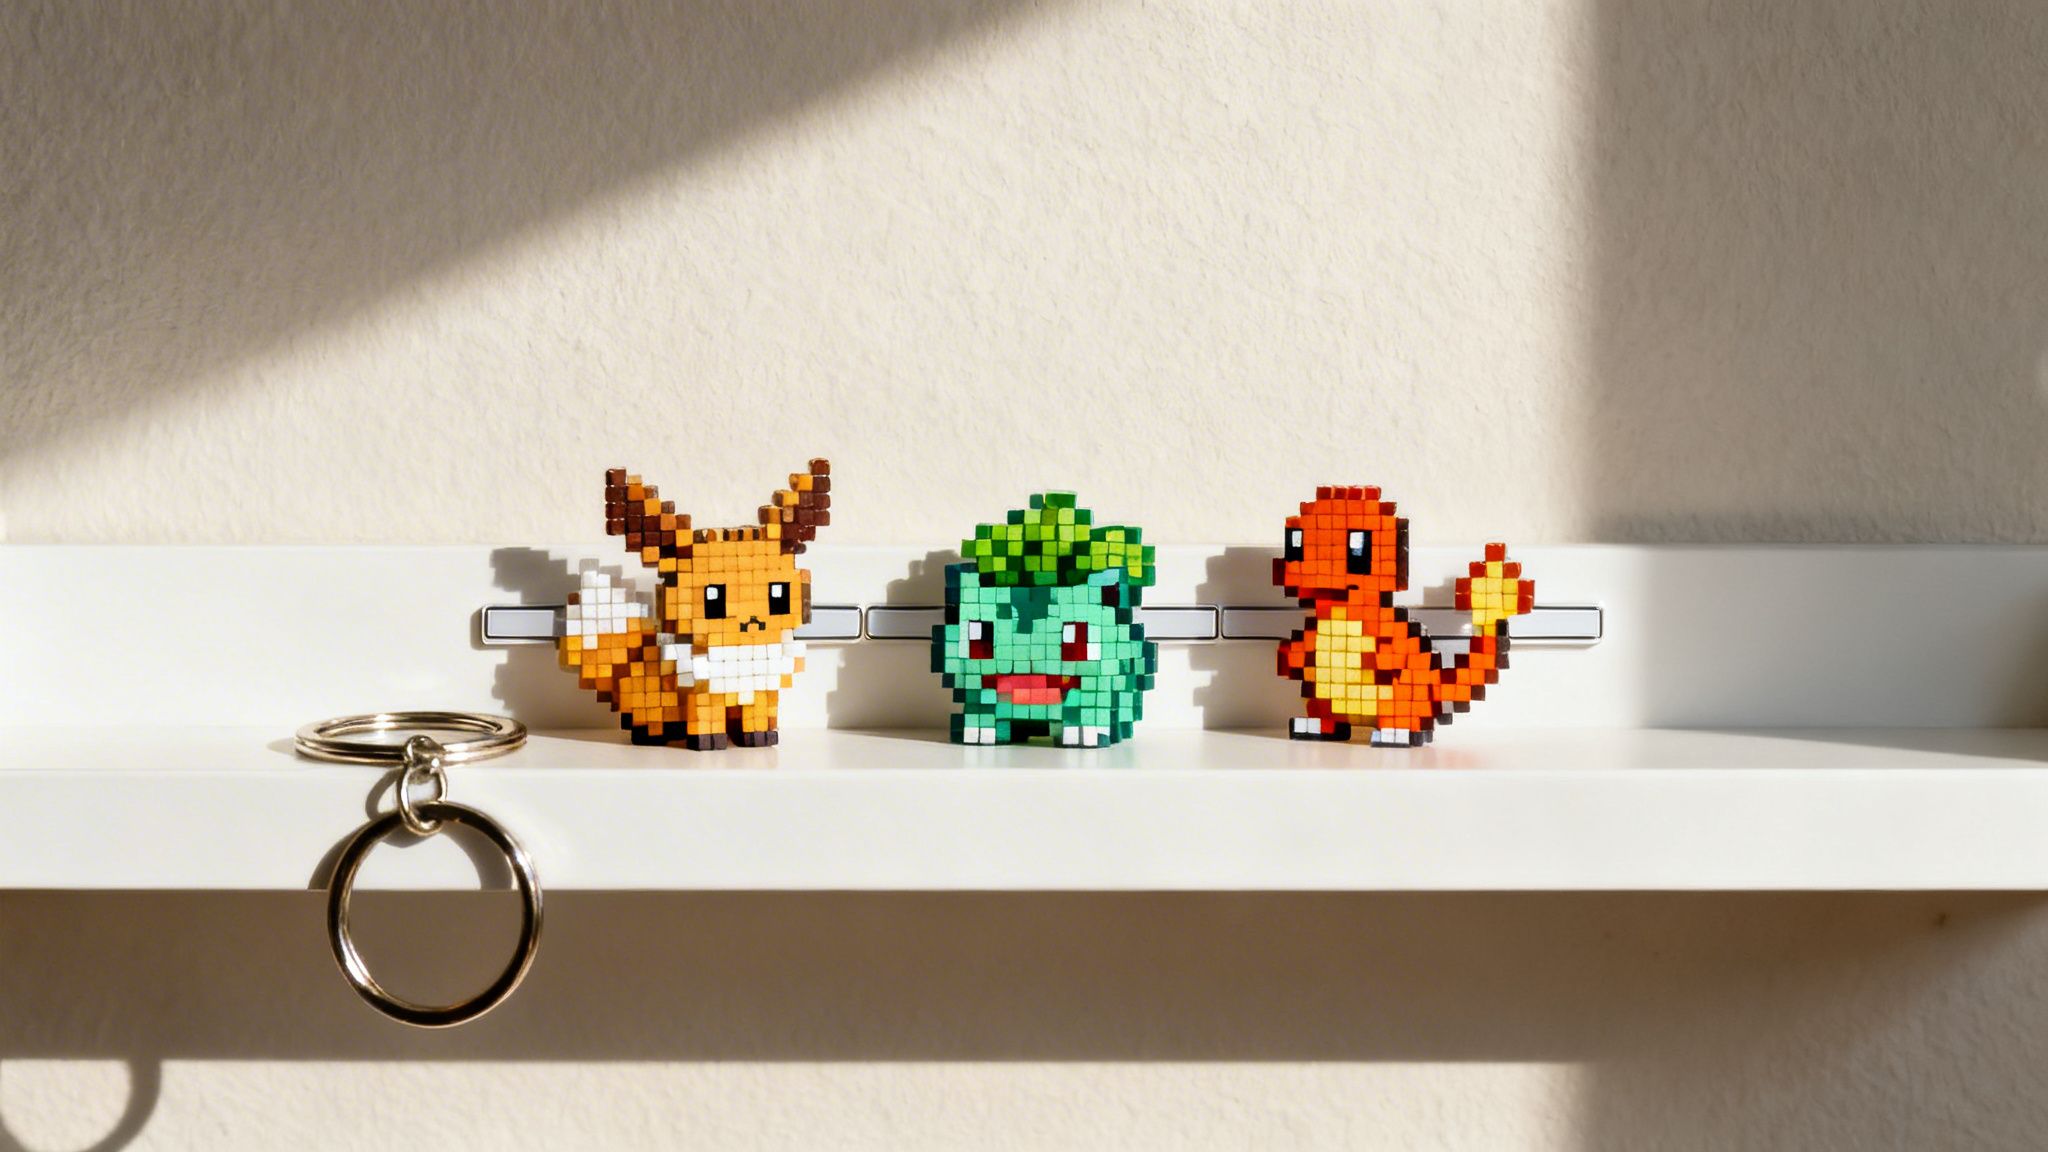
This global appeal just goes to show that whether you’re making a tiny Eevee keychain or a set of Gengar coasters, you’re part of a massive worldwide community of creators.
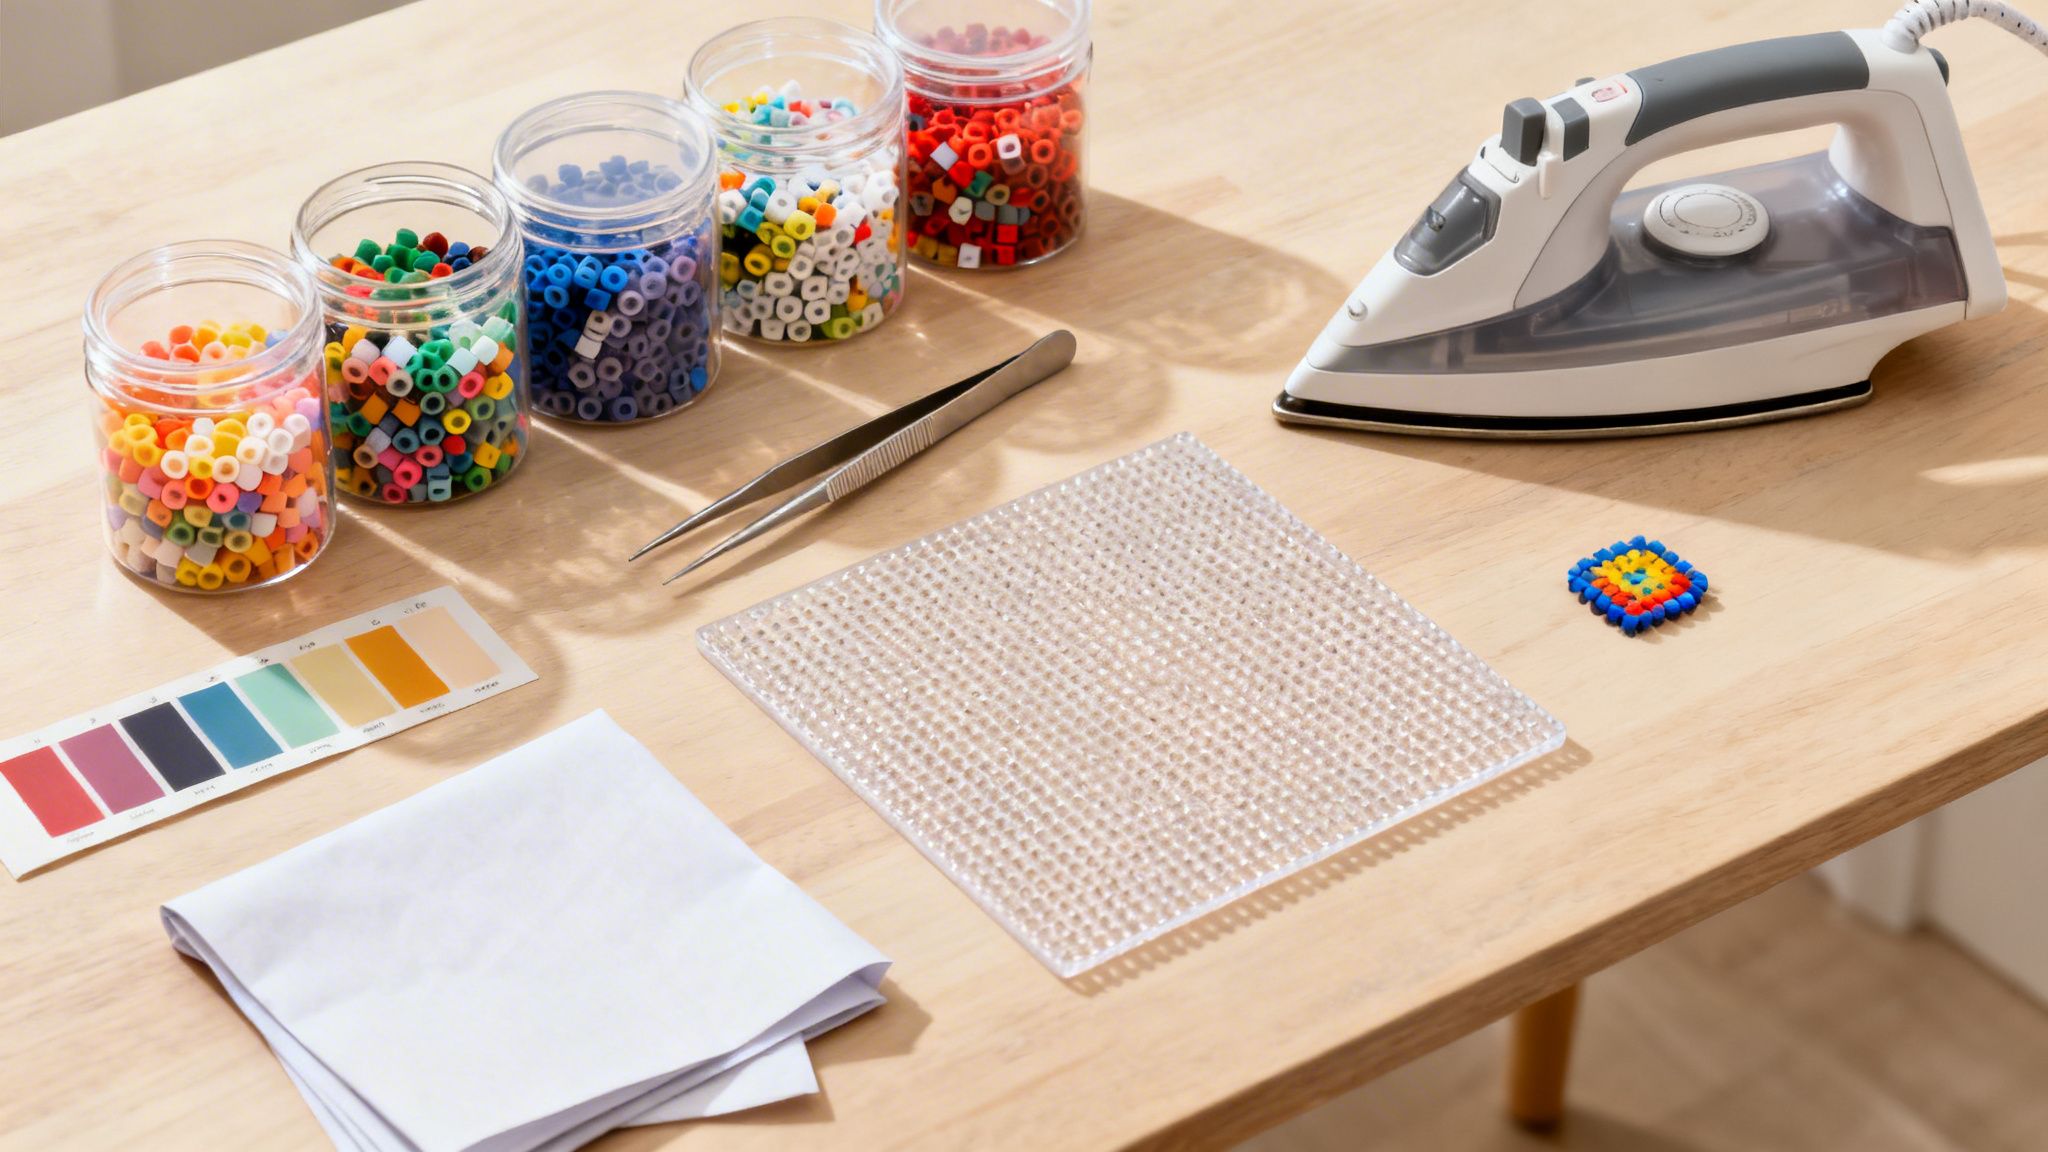
Before you can bring your first Pokémon bead creation to life, you need to get your crafting station set up. This isn't about buying the most expensive gear, but choosing reliable supplies that give you consistent results and, most importantly, make the process a joy.
The beads themselves are the heart of any project. You'll find a few major brands out there, and each has its own personality that can really affect the look and feel of your finished Pokémon.
I started out with a big jar of Perler beads, but now my collection is a mix. I often pull in specific Artkal shades when a project needs that perfect colour gradient. Just be mindful that mixing brands in a single piece can sometimes result in an uneven melt, as they're all made from slightly different plastics.
Beyond the beads, a few key tools will make your crafting sessions go so much more smoothly. A good pegboard is absolutely essential. For bigger Pokémon sprites—think Snorlax or Charizard—you’ll definitely want a set of interlocking square pegboards. These let you click multiple boards together, creating a much larger canvas to work on.
Next up: tweezers. You can place beads by hand, but trust me, a good pair of fine-tipped tweezers will save your sanity. They give you the precision to work fast, place beads exactly where you want them, and fix any little mistakes without causing a pixelated avalanche.
Finally, let's talk about the magic that happens at the end. You'll need parchment paper (the kind you use for baking works great) to cover your design before you iron it. You don't need a special craft iron, either—a small, basic household iron without steam holes is all it takes.
A word of warning I learned the hard way: using an iron that's too hot can instantly turn your masterpiece into a melted puddle and even warp your pegboard. Always start on a low-to-medium heat setting and do a quick test on a small corner first.
Getting your starter kit together is simple. A large mixed jar of Perler beads, a set of four interlocking pegboards, a pair of tweezers, and some parchment paper will get you well on your way for under £30. As you get hooked and take on more ambitious Pokémon bead pattern projects, you can start building out your colour collection. If you want to get strategic with your palette, you can learn more about creating a colour mixing chart to help plan your designs beautifully.
Every great bead sprite starts with a solid pattern. Think of it as the blueprint for your project, and getting this first step right is absolutely essential. The wonderful thing is, you’re not starting from scratch. The internet is brimming with thousands of free, ready-to-use Pokémon bead patterns, from the classic 8-bit game sprites to more modern, detailed designs.
Your best starting point will be websites and online communities dedicated to pixel art and bead sprites. A quick search for "Pokémon bead sprites" or a specific character like "Pikachu Perler pattern" on sites like Pinterest or DeviantArt will open up a world of possibilities. Many of these are pulled directly from the video games, giving you an authentic, pixel-perfect guide to work from.
But what if you have something special in mind that you can't find? Perhaps it's a piece of fan art you adore, a screenshot from the anime, or even a picture of a favourite Pokémon plushie. This is where you can go beyond ready-made patterns and create something truly your own.
There are several fantastic online tools that can convert almost any image into a bead-ready grid. These "pixelators" or "bead pattern generators" analyse an image you upload and map it onto a grid, assigning bead colours based on the original picture. You can make this process as simple or as complex as you want.
My personal tip: When you first generate a pattern from a detailed image, it will probably throw dozens, if not hundreds, of different colours at you. Don't panic! The next step is all about whittling this down to a manageable palette that matches the beads you actually have on hand.
Once your pattern is generated, it’s time for the refining process. The first version might be far too large or contain too many similar shades of the same colour. Your goal here is to scale the design down and reduce the colour count without losing the essential details that make your Pokémon instantly recognisable.
Here’s the practical method I always use for simplifying colours:
This technique is very similar to how designers simplify complex images for other grid-based crafts. For instance, if you want to create custom text, the principles of simplifying shapes and colours are key, as you can see in our guide on how to make your own cross stitch letters.
Scaling is just as important as colour mapping. If a pattern is too big for your pegboards (or your patience!), you'll need to reduce its pixel dimensions in the generator tool before you start. A smaller, simpler Eevee might only be 30x30 beads, while a larger, more detailed version could easily be 60x60. Don't be afraid to experiment to find the size that perfectly captures the detail you envision. All this prep work pays off, saving you a huge amount of time and beads later.
You've got your Pokémon pattern sorted, and now for the really fun part—bringing your character to life on the pegboard. This is where all that prep work pays off. It’s a wonderfully calming process, watching a familiar face emerge one bead at a time.
This flowchart breaks down how you get from a simple image to a workable pattern ready for your pegboard.
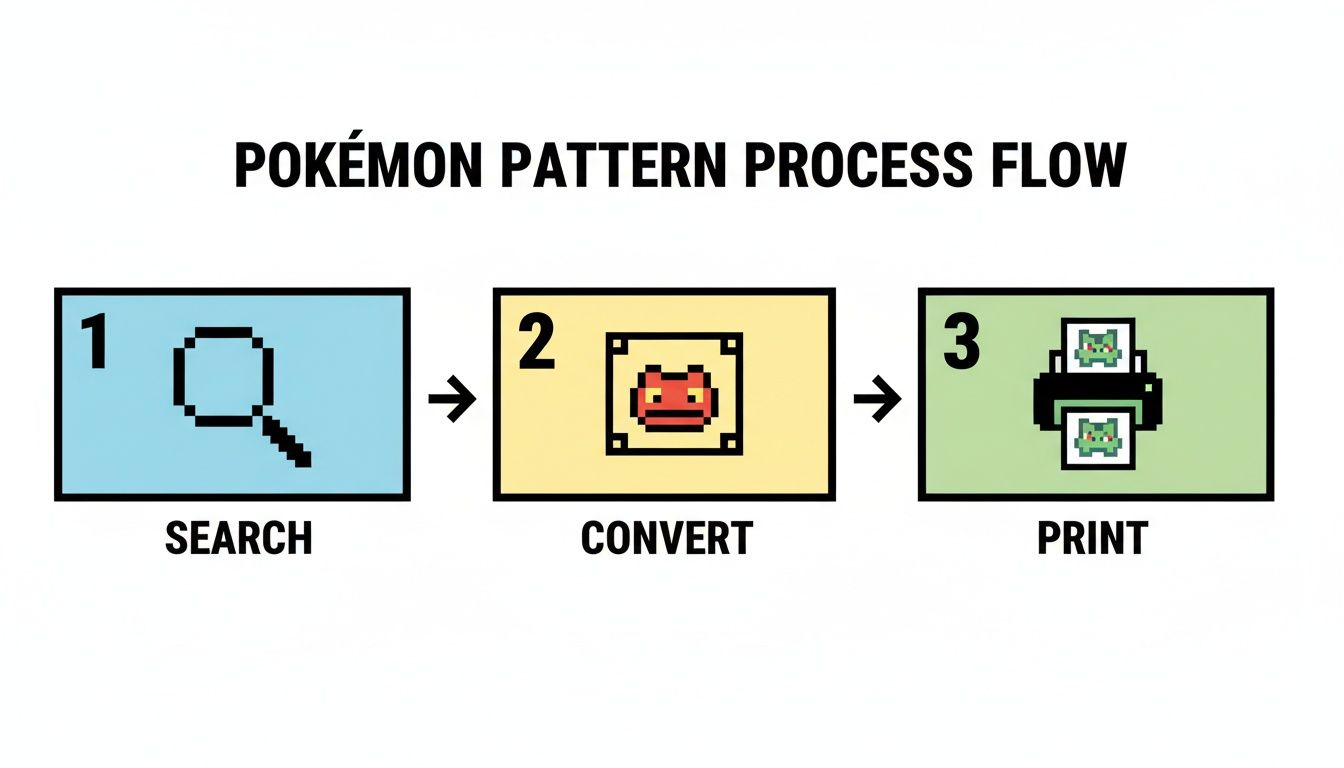
It really boils down to three simple actions: finding your source sprite, turning it into a bead-friendly grid, and printing it out. Having this physical blueprint in front of you makes the whole process so much smoother before you even touch a bead.
The best piece of advice I can give is to always start with the black outline. I can't tell you how many times this has saved me from a major headache. Think of it as building the skeleton of your Pokémon; it creates a solid frame for the entire piece. It’s so much easier to spot a misplaced bead in the outline than when it’s lost in a sea of colour.
With the frame complete, I start filling in the colours, usually working one shade at a time. If I’m making a Charmander, for instance, I’ll place all the yellow beads for his belly first, then move on to all the orange body beads. It helps me stay organised and avoid grabbing a similar but incorrect shade by mistake.
My go-to workflow is a mental checklist: Outline first, then fill in the colours from lightest to darkest. I find this stops the darker beads from visually overpowering the lighter areas, and I get to see the sprite really pop as I build it.
Fusing the beads with an iron is the final, and most crucial, step. This is what turns your loose beads into a solid piece of art, but it's also where things can go wrong if you rush. I always recommend a medium, dry setting on a standard household iron—and absolutely no steam! Steam adds moisture, which can completely ruin the final melt.
Start by gently laying your ironing paper over the whole design. When you start ironing, use slow, circular motions and let the weight of the iron do the work for you. You don’t need to press down hard. You should see the beads begin to fuse through the paper in about 10–15 seconds.
For any Pokémon sprite larger than your hand, the tape method is an absolute game-changer. Trust me. It's the secret to getting a perfectly flat finish every time while also protecting your pegboards from warping under the heat.
Here’s how it works:
Not only does this technique save your pegboards, but it also frees them up so you can get started on your next project while the first one cools. It’s a must-know trick if you plan on making a lot of bead art.
With the careful work of ironing complete, your Pokémon sprite is now a single, fused piece. This is where the real magic happens, as you apply the final touches that elevate your project from a simple craft into a durable piece of art you can proudly share.
Once you’ve finished ironing, the plastic will be incredibly hot. The first thing you'll want to do is carefully peel back the parchment paper. At this stage, the fused beads are very pliable and have a tendency to curl up at the edges as they start to cool.
To prevent this frustrating warping, place your warm Pokémon sprite onto a flat, heat-safe surface and immediately cover it with a heavy book. A large, thick cookbook works perfectly for this. You’ll need to let it sit for at least 15-20 minutes, or until it's completely cool to the touch. This simple pressing technique is the secret to ensuring your creation stays perfectly flat and professional-looking.
Now for the most rewarding part—deciding what your new creation will become. A finished Pokémon from a bead pattern is wonderfully versatile. With only a few extra supplies, you can transform your hard work into something both functional and fun.
A personal favourite technique of mine is to create a dynamic wall display. By making several Pokémon from the same generation or type, you can arrange them on a wall with removable adhesive strips. This creates a stunning, gallery-style feature that brings the pixelated world of the games right into your room.
Attaching findings—the small bits of hardware like rings and clasps—is what gives your project a polished, finished look. For keychains, a jump ring is essential for connecting the bead sprite to the main chain. You can gently pry one open with pliers, loop it through the hole you made in your sprite, and clamp it securely shut.
If you'd like a more detailed walkthrough, you may be interested in our guide on creating your own key ring projects.
Whether you are crafting a gift for a fellow fan or building your own collection, these final touches add both durability and personality. Your handmade Pokémon bead art is now ready to be shown off to the world.
Even after years of making these, I still run into the occasional hiccup. Your Pokémon beads pattern can look absolutely flawless on the board, but things can sometimes go sideways during that final, crucial fusing stage. Don’t panic—most common problems are surprisingly easy to fix with a few tricks I've picked up through plenty of my own trial and error.
One of the biggest frustrations is getting an inconsistent melt. You might pull the paper back to find some beads fused perfectly while their neighbours are still loose. Or even worse, the whole thing has melted into an unrecognisable puddle.
The secret to a perfect fuse almost always comes down to two things: heat management and movement. An iron that’s cranked up too high is the number one culprit behind over-melting. If your beads are losing their holes and blending into a single, flat sheet, you need to turn that temperature dial down.
On the other hand, if your project crumbles and falls apart after it cools, that’s a classic sign of under-melting. This usually means your iron was too cool or you didn't apply heat for long enough. Try bumping the temperature up just a bit or ironing for another 10-15 seconds, always keeping the iron moving in slow, circular motions to spread the heat out.
An uneven finish, with some spots melted flat and others barely fused, almost always points to your movement. You have to make sure the iron is constantly gliding over the parchment paper, never staying in one place for too long.
I always recommend doing a quick test run with a few scrap beads before you commit to ironing a large, complex Pokémon design. This five-minute test can save you hours of frustration and wasted beads by helping you find that sweet spot for your iron and brand of beads.
Another all-too-common headache is a warped pegboard, which is usually caused by too much heat or pressure during ironing. If you notice a slight bend in your board, you can often flatten it out. Just warm it gently with a hairdryer and then press it flat under a heavy book while it cools down completely.
Of course, the best way to deal with warped boards is to prevent it from ever happening. Using the "tape method" for every single project is the most reliable way to protect your boards for the long haul.
But what about when disaster strikes and a finished project snaps? Don't toss it! A broken Pokémon bead creation is almost always salvageable. Just place the broken pieces back together on a flat, heat-safe surface, cover them with parchment paper, and very carefully re-iron the seam until the beads fuse back together.
We’ve all been there: you’re in the zone, nearly finished, and you run out of a crucial colour. Instead of grinding to a halt, this is a chance to get creative with your pokemon beads pattern.
Try substituting a similar shade. Sometimes, using a slightly lighter or darker bead for a small section can add some unexpected depth and character to your piece. It's a small change that can turn what feels like a mistake into a unique, one-of-a-kind feature.
Ready to start your own creative journey with authentic Swedish crafts? At Dalaart, we offer beautiful, hand-carved DIY Dala horses that you can paint and personalise at home. Explore our collection at https://dalaart.com.


.svg)


.png)


